Gaming on the go is fun, but often the power you can bring with you in a mobile setup is lackluster compared to what you can have for the same price sitting on your desk.
For a long time I have been uninterested in game streaming (primarily because it was mostly corporations wanting you to rent games or hardware instead of owning them) - but I'll admit it here: I was sleeping on the self-hosting potential of game streaming. With modern internet speeds, you can stream games easily across LAN or even over WAN with totally acceptable and even surprisingly good latency. In areas where I have a 5G mobile connection, I have even been able to play games streamed to my phone with surprisingly good latency. Not something I'd want to play a fast-paced first person shooter with, but I was able to play action RPGs like the Xenoblade series over my mobile connection with zero complaints whatsoever.
This guide will cover how to set up Sunshine and Moonlight, as well as some cool tricks with KDE (or gnome) to make the resolution and refresh rate better match your client device for cleaner looking streaming.
So, now that you're hopefully sold on the concept, let's give it a shot!
Sunshine Setup
First, you'll have to install sunshine. You can do it a few different ways:
- Building from the source on their GitHub
- Downloading a sandboxed version from FlatHub
- Downloading it as a system package in supported Linux distributions
I'm on CachyOS and so I have downloaded the package provided in their hosted repos, but any method can be as effective as another. Just be aware with the flatpak you may have to spend some time giving it permission to access your game directories.
Once you've finished installing, you're basically good to launch. If you are on X11, Sunshine will ikely work out of the box. You can start the program either from your shortcut/start menu or by entering systemctl start sunshine in the command line. After doing this, if you'd like Sunshine to start at launch on your system, enter systemctl enable sunshine. (Both of these are assuming that you are on a distribution using systemd for services).
If you are on wayland you will need an additional command to capture the display properly
For wayland display capture to work for sunshine, you need to give Sunshine some additional "capabilities" using setcap. The command is as follows:
sudo setcap cap_sys_admin+p $(readlink -f $(which sunshine)).
Be aware: this gives Sunshine a number of additional capabilites that would normally require root. As of right now, this is necessary to allow Sunshine to use KMS capture, the system utility which will allow us to capture the wayland session. For a list of all the things this allows Sunshine to do, see the manpage for setcap here. Hopefully soon in the kernel this capability can be separated from such an overloaded role in the system.
Once this has been set, you can continue to start Sunshine normally like you would in the X11 session above.
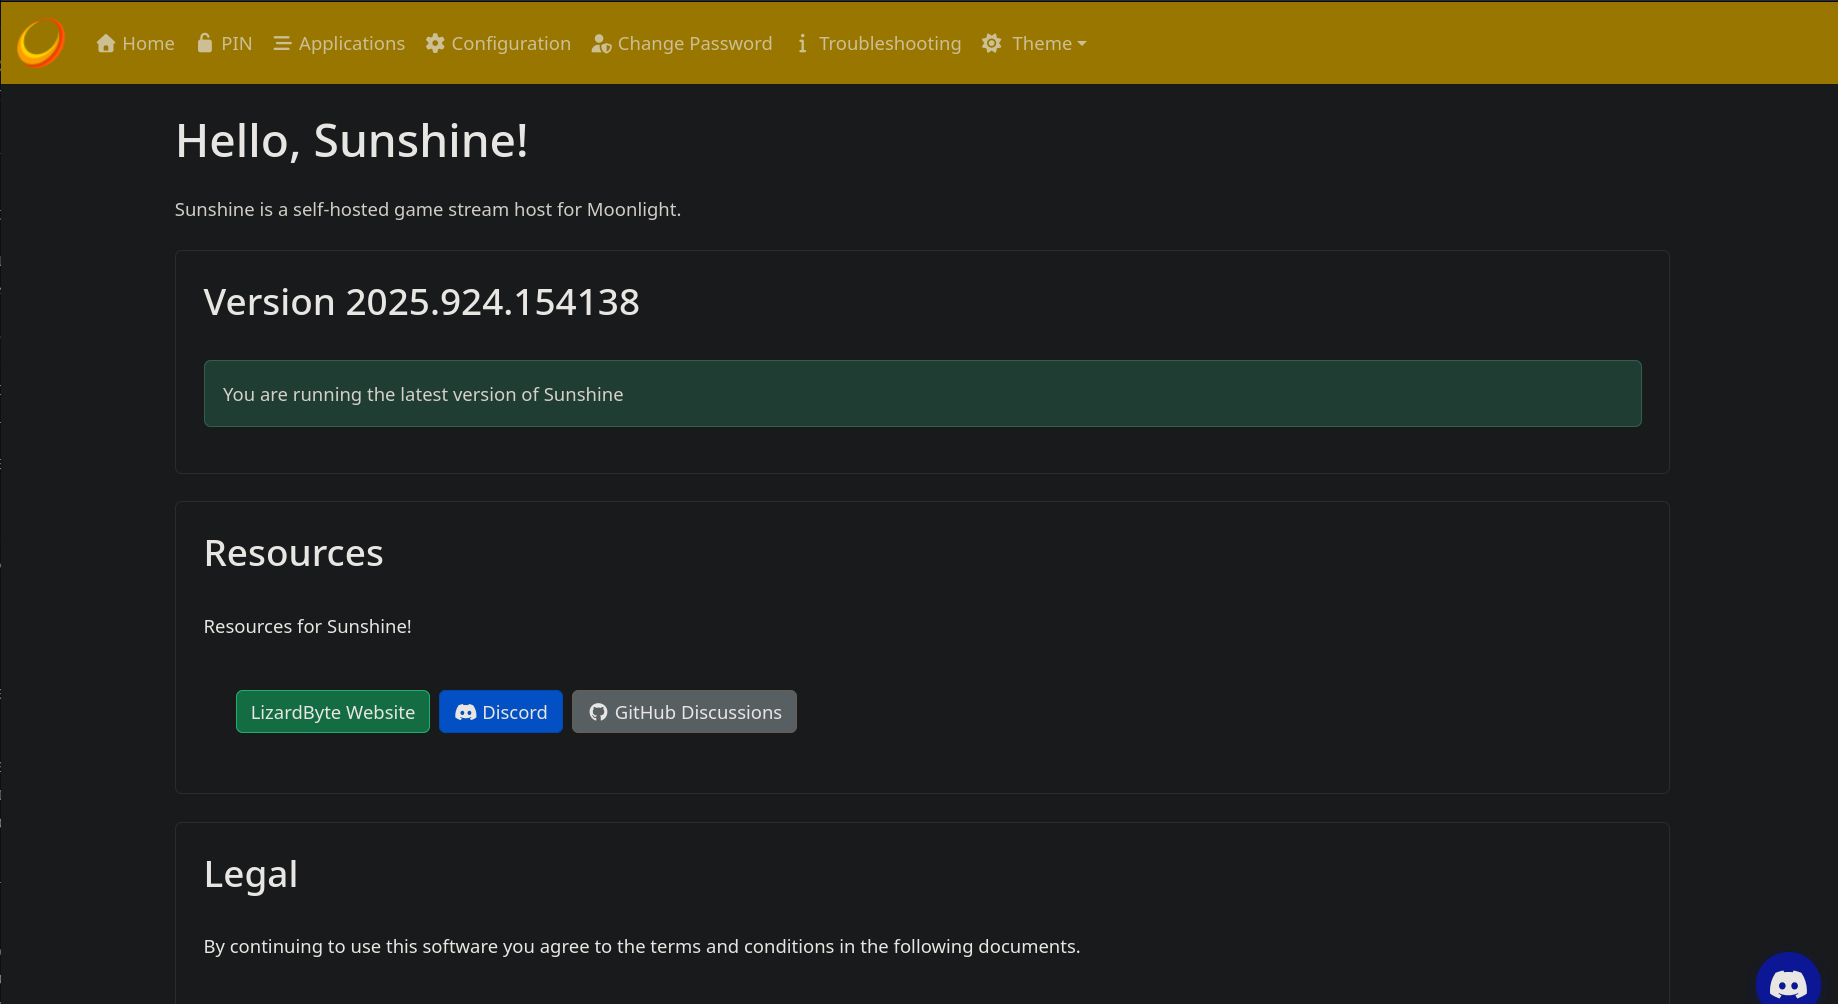
Now that our Sunshine daemon has been started, we can connect to the webui through http://localhost:47990 in our browser and get configuring.
Sunshine Configuration
When first opening the Sunshine WebUI you are going to be prompted to make an admin username and password. Do so, and remember them/store them in your password manager of choice.
Head over to the configuration section, and do some basic setup. Set the locale to whatever language you prefer, name the Sunshine instance to have an easy identifier of your system, and I personally prefer to have the system tray icon enabled because I use it for streaming from my desktop, not a dedicated game stream server.
Audio/Video
In the "Audio/Video" section of the configuration, it can be a good idea to set the "Audio Sink", which will be the audio output that Sunshine will be piping over to your client device when game streaming. To figure out what the ID of your device is, there is a different command to run depending on whether you are running PulseAudio or PipeWire. If you aren't sure which you have, just try each command. One will work, one won't.
PulseAudio: pacmd list-sinks | grep "name:"
PipeWire: pactl info | grep Source
You should find an output that resembles your default audio output. In my case, it is this:
Default Sink: alsa_output.usb-SteelSeries_SteelSeries_Arctis_1_Wireless-00.analog-stereo. Copy paste the entry for "Default Sink" (so everything after the colon, ignoring the space) into the "Audio Sink" section of the config.
Network
Most of these can be left at their defaults, but because if you are using Wayland you have given sunshine some pretty broad permissions on your system, I recommend ensuring that "UPnP" is disabled, as well as "Origin Web UI Allowed" is set to "Only those in LAN may access Web UI".
If you have any reason at all not to distrust the local network you are using, for example a school network or something, it is a good idea to enable "LAN Encryption Mode". Depending on how you want to set your threat model, you can either "Enable for Supported Clients" or you can make it a requirement to connect.
Past those settings, I recommend leaving defaults unless you know what you're doing, mainly because it is set up quite well for streaming already and if you don't have good knowledge of encoding you may just make your performance worse.
Command Preparations
Heading back over to the "General" section of configuration, I recommend setting up some optional commands that make the gameplay experience work much better on your client devices without tons of extra fiddling.
A problem I ran into at first was that the client devices I wanted to play on (my phone, my steam deck) are roughly 16:9. I use an ultrawide monitor, so the display being streamed was in 21:9 and so I would end up with huge black bars above and below my game stream which made trying to read any text very difficult. With some additional configuration this can be easily fixed, which I'll show you now.
Note: if using gnome replace the kscreendoctor commands with those that can be found here.
Hit "add" in the "Command Preparations" section of the general config. This will give you a "do" and an "undo". Basically, it will run the "do" command right before the game starts, and the "undo" command after the game is closed. Using this and a handy tool called kscreendoctor, we can temporarily modify the resolution and refresh rate that our system is running at to match the device we are streaming it to, which makes things look so much better if you have mismatched aspect ratios between devices (especially as mobile devices tend to have odd aspect ratios).
You first need to find out what ID your monitor has in kscreen-doctor. You can do this by running kscreen-doctor -o. You will get an output that looks something like this:
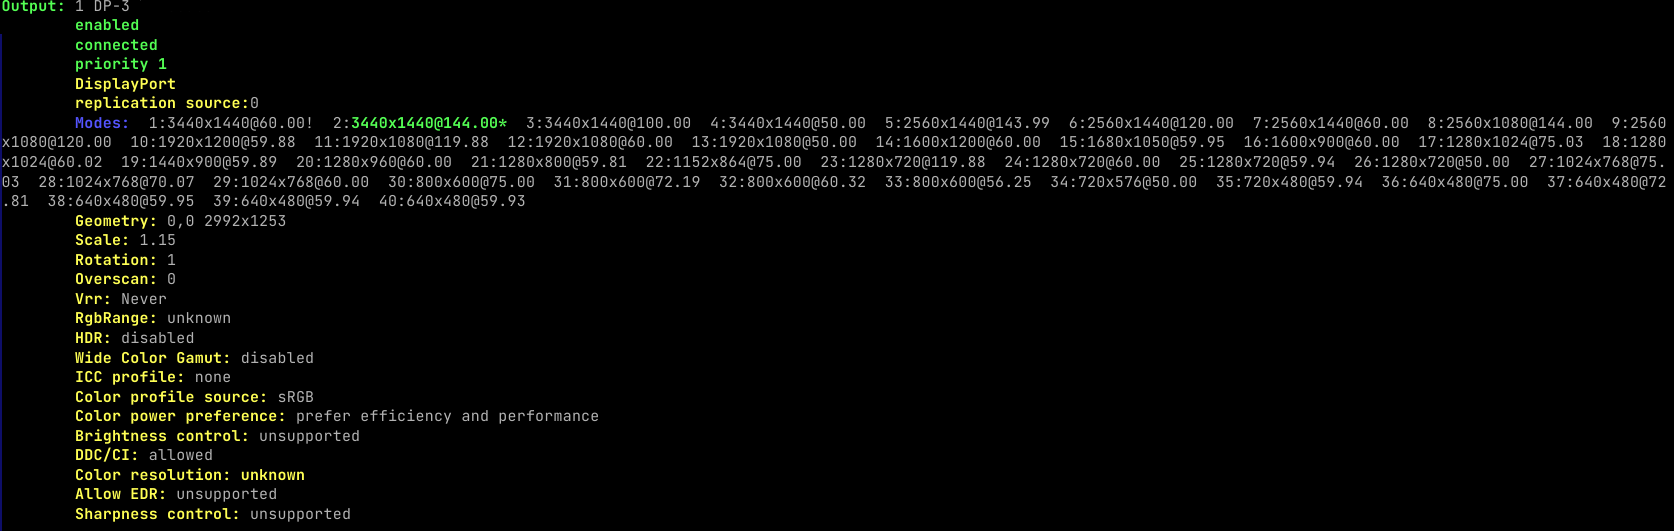
In my case, it shows up as "1 DP-3", which means "DP-3" is the reference internally to my monitor. In the "Do Command" section of adding a game, add in:
sh -c "kscreen-doctor output.DP-3.mode.${SUNSHINE_CLIENT_WIDTH}x${SUNSHINE_CLIENT_HEIGHT}@${SUNSHINE_CLIENT_FPS}"
But be sure to substitute "DP-3" in my example for the ID you got from the command. This command temporarily sets your desktop device's resolution, aspect ratio, and refresh rate to match that of the client that requested the connection.
Next, under "Undo Command" we need to change it back. In the kscreen-doctor -o output, there will be a long list of "Modes" for the monitor. The one with the * next to it (or is highlighted if you have colourful terminal set up) will be your current mode. The command for undo will be
kscreen-doctor output.DP-3.mode.2
In this case, you can see from my kscreendoctor output that this will set the monitor back to my preferred 3440x1440@144hz for my ultrawide monitor (listed after 2: in the "modes" section of the kscreendoctor output). Make sure you substitute "DP-3" for the ID you found for your own monitor, and the mode number to whichever your preferred resolution and refresh rate normally are.
Now this will run before and after all games unless they have the "Global Prep Commands" disabled in their configuration section.
Adding Games
In the "Applications" section at the very top of your screen, you will have one or two "Example" games to help you learn how to set up the program. While these defaults are fine, I've found settings them up a slightly different way to offer better user experience.
First, figure out the game you want to add. The two ways I'll be demonstrating are for launching games through Steam or Heroic, and the methods work for games manually added to both of those launchers as well.
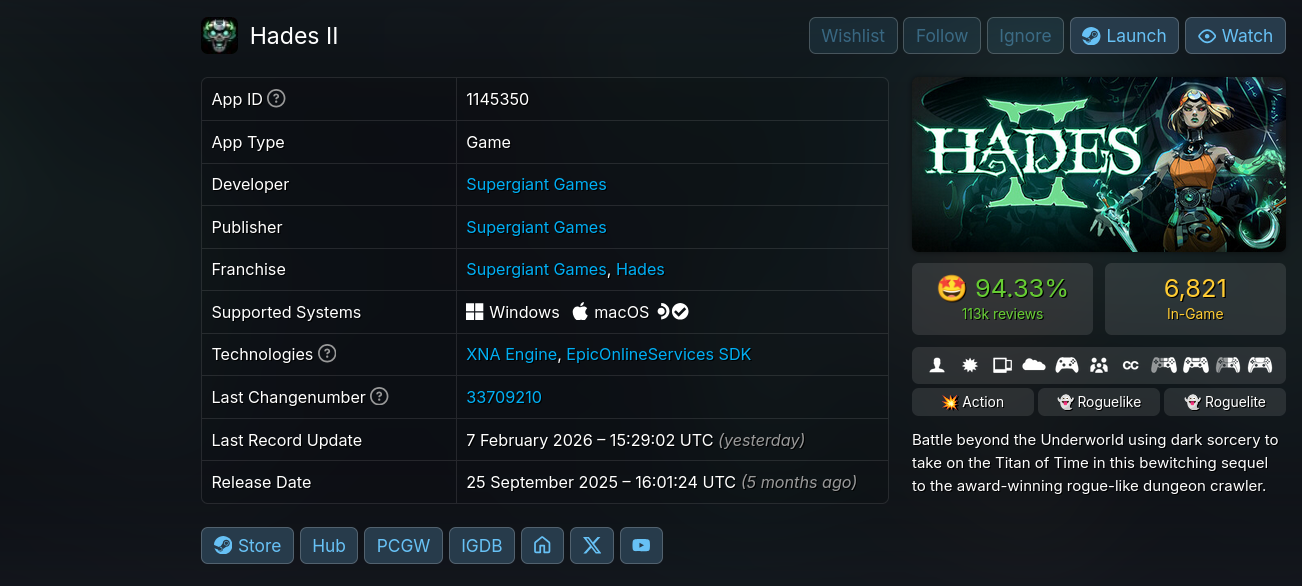
As an example, let's pick Hades II. To make the game launch through Steam, we need to know the game's ID in steam. For games that are purchased from steam you can just use something like SteamDB which will have the app ID prominently displayed:
If the game has been manually added to your library, however, it will not have an entry on steamDB. What you need to do is find the game in your steam library, right click the entry, hover over "Manage" and select "Add desktop shortcut" (don't worry, you can delete this right after). Find the shortcut that was made, right click and head into the properties, and move over to the "Application" tab. In the "Arguments" section, you'll find something along the lines of steam://rungameid/11576581666969420.
If you are using Heroic instead to launch your games, the process is very similar. In your Heroic library, left click into the main page of the game you want to add in your library. In the three dots in the top right, you should find an entry for "Adding Shortcuts", and after that the process is the same. Find the shortcut, and in the same "Arguments" section discussed above, you'll find something that looks more like heroic://launch?appName=rceTLAXCiwhawseofi484AL&runner=sideload. This is what you'll want to save in place of the steam rungameid command that we use for steam above.
Once you have grabbed the command/app ID of what you want to be launching, head back over into Sunshine. Rather than entering the game into the regular "Command" section, hit the button directly above that field to "Add Detached Command". In this field, you want to enter the argument from either steam or heroic above, and as a prefix add either setsid heroic or setsid steam, like these examples:
setsid steam steam://rungameid/11576581666969420

setsid heroic heroic://launch?appName=rceTLAXCiwhawseofi484AL&runner=sideload
Additionally, if you would like the resolution to change and then change back as detailed in the configuration section up top, make sure you leave "Global Prep Commands" checked.
Now you can hit save at the bottom and the game will be launchable from a connected moonlight client!
Moonlight Setup
First, you must download a Moonlight client to your device. If you are doing this on a Steam Deck it can be found in the Flathub store called Discovery in your desktop environment. On android this can be found on the F-Droid store. Once installed, boot it up! If you are already on the same LAN as your Sunshine device, you should see the friendly name you set up earlier. Click/tap on it, and you'll be prompted with a pin that you must enter into Sunshine to pair the devices. In the sunshine WebUI, enter the "Pin" section at the very top, name the client device, and they will be all set up!
Now when you click or tap on the device in moonlight it will open up your library, from which you can start whichever game you choose and they will launch and begin streaming to your device. Ensure any controllers you wish to use in your game are connected to your device running Moonlight before launch or they will not be recognized.
You can play with the settings regarding the resolution you are streaming at on your client device and whatnot depending on your hardware and how fast your internet connection is, but I'll leave those up to you.
Playing over WAN
Because of the level of access that Sunshine has over your device, I do not recommend opening any of the ports for it in your router for use over the internet. If you are going to do so, do it through use of a Wireguard tunnel or a service like Tailscale.
Otherwise, though, works exactly the same, maybe with a touch more latency. On a 5G connection, I found most games pleasantly suprising in how normal the play speed and latency were.
That's all for now! I may flesh this out further in the future but for now I hope you have as much fun as I am streaming games to my phone and steam deck from my gaming PC. If you have questions that I might be able to help with, feel free to drop me a line in my Signal support room.