Coming in the near future: additional hardening using discrete docker networks to prevent cross-stack contamination, and running a local reverse proxy for access outside the network.
This guide is designed to teach you how to set up qBittorrent to operate through GlueTUN in docker, allowing you better control over what operates over VPN and what does not. This allows you to run both VPN and regular net containers in the same project.
While the following will be generally applicable to docker as a whole, but will primarily be discussing docker-compose methods and use of gui tools like dockge or arcane as those are the methods I am personally most familiar with.
Before you start, there are a few things to check. Look at the GlueTUN wiki to see if your provider is supported. If it is, it will make things a whole lot easier. If not, you can still use it but you'll have to set up a bunch of custom settings.
From this point forward, I'm going to assume you have dockge (or another docker GUI like Arcane) installed or are proficient enough with docker-compose CLI that you can run a stack from a compose file yourself.
Also, in case you are reading this guide and are newer to docker, it can be useful to make a limited-permission docker user for additional security. I've done this personally using DrFrankenstein's guide for synology devices and there are guides from docker on doing it on a real operating system.
Additionally, before you start you'll probably also want to set up a few directories:
/docker/projects/vpnproject-compose
/docker/gluetun
/docker/qbittorrent
Step 1: Your docker-compose
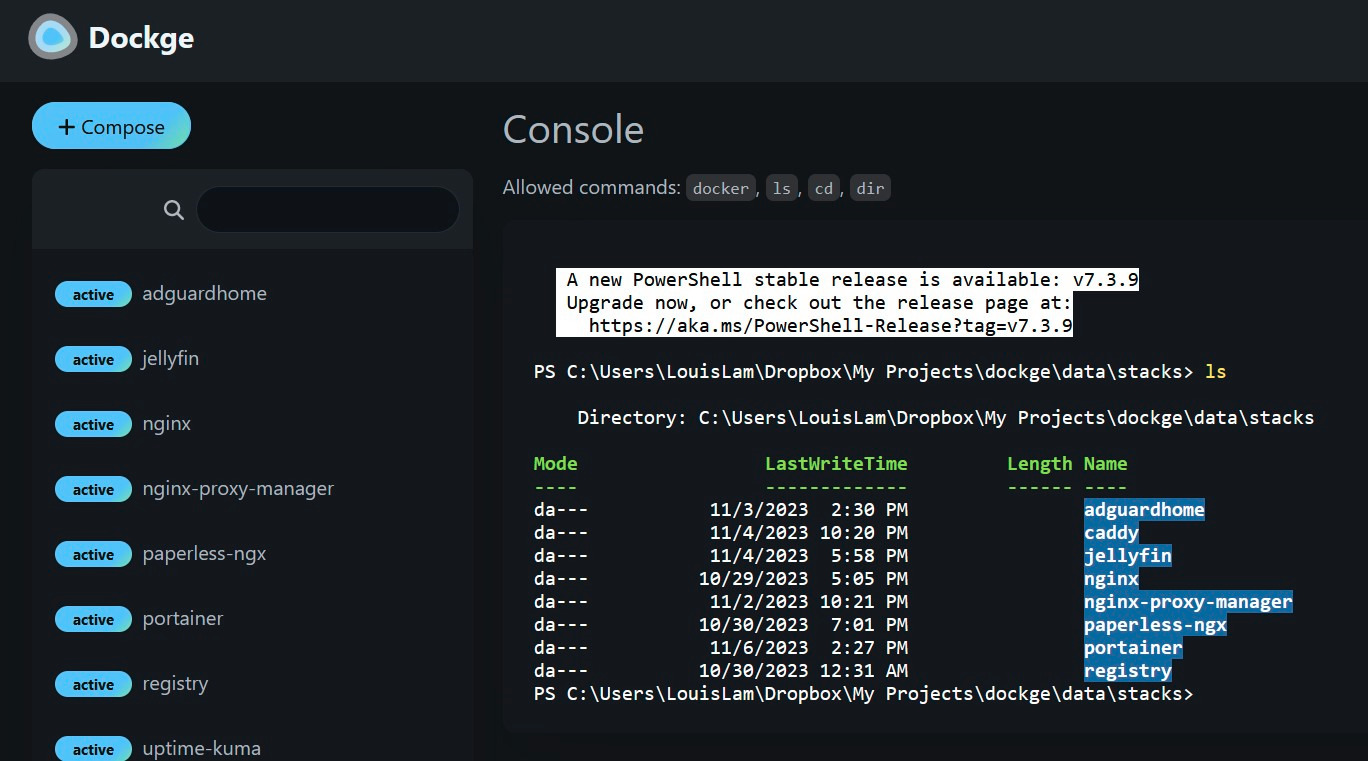
In dockge, click the +compose in the top left, if using other methods this will be your docker-compose.yml. After you've made the directory for your docker project, you'll need to set up what your containers are and some important environment variables for each of them. Here I'll paste an example template and then explain what we're doing in it below.
    services:
      gluetun:
        image: qmcgaw/gluetun:latest
        container_name: gluetun
        cap_add:
          - NET_ADMIN #Gives gluetun the necessary permissions to manage VPN connections
        devices:
          - /dev/net/tun:/dev/net/tun
        ports:
          - 8080:8080 # port for qbittorrent
          - XXXX:XXXX # port for qbit port forward if your VPN supports this
        volumes:
          - /docker/gluetun:/gluetun
        environment:
          - PUID=1000 # Set this to your restricted docker user ID and group ID, otherwise ignore these environment variables
          - PGID=1000
          - VPN_SERVICE_PROVIDER=airvpn
          - VPN_TYPE=wireguard
          - SERVER_COUNTRIES=CountryChoice
          - WIREGUARD_PUBLIC_KEY= XXXXXXXXXXXXXXXXXXXXXXXX
          - WIREGUARD_PRIVATE_KEY= XXXXXXXXXXXXXXXXXXXXXXX
          - WIREGUARD_PRESHARED_KEY= XXXXXXXXXXXXXXXXXXXXX
          - WIREGUARD_ADDRESSES=XXXXXXXXXXXXXXXXXXXX
          - WIREGUARD_DNS_ADDRESS=XXXXXXXXXXXXXX
          - UPDATER_PERIOD=24h
          - TZ=Your/Tz
          - FIREWALL_OUTBOUND_SUBNETS=172.20.0.0/16,192.168.0.0/24 #Replace these subnets based on the explanation below
        healthcheck:
          test: /gluetun-entrypoint healthcheck
          interval: 30s
          timeout: 10s
          retries: 3
          start_period: 40s


      qbittorrent:
        image: linuxserver/qbittorrent:latest
        container_name: qbittorrent
        environment:
          - PUID=1000
          - PGID=1000
          - TZ=Your/TZ
          - WEBUI_PORT=8080
        volumes:
          - /docker/qbittorrent/config:/config
          - /your/torrent/directory:/data/torrents
        network_mode: service:gluetun # run on the vpn network
        healthcheck:
          test: nslookup google.com 127.0.0.1 || exit 1
          interval: 30s
          timeout: 10s
          retries: 3
          start_period: 30s
        depends_on:
          gluetun:
            condition: service_healthy
        restart: unless-stopped

      stack-restarter:
  	    image: docker:cli
  	    container_name: stack-restarter
  	    restart: unless-stopped
  	    volumes:
 	       - /var/run/docker.sock:/var/run/docker.sock
     	healthcheck:
          test: test -f /tmp/healthy && test $$(( $$(date +%s) - $$(stat -c %Y /tmp/healthy) )) -lt 120
 	      interval: 30s
          timeout: 5s
          retries: 3
          start_period: 60s
  	    command: >
 	      sh -c "while true; do
 	        sleep 30;
            touch /tmp/healthy;
   	        if ! docker exec gluetun /gluetun-entrypoint healthcheck 2>/dev/null; then
              echo 'Gluetun unhealthy, restarting stack...';
              docker restart gluetun qbittorrent;
              sleep 60;
      	    fi;
 	      done"
What did we do here?
We create two services (or containers): one called gluetun, one called qbittorrent.-
"image" is the URL of the docker image docker is going to be pulling from. After the colon you can put a specific version, but I typically prefer to pull the latest updated image as shown above.
-
"container_name" is pretty self explanatory, it decides what the name of the container you are creating with this image will be.
In the GlueTUN container specifically, we have a few important lines:
-
"cap_add" is used in this instance to give the GlueTUN instance the ability to manage VPN connections.
-
"devices" makes sure the GlueTUN container can access the "tun" network device by mapping its location to the container. If you try this and are still seeing errors regarding /dev/net/tun or something along those lines, you may not have the "tun" kernel module installed on your system. A few ways to fix this can be found here.
-
"ports" maps public ports from your VPN (which we are sorting of pretending is a router) to local ports in your GlueTUN "machine". The ports on the left side of the colon are the public port to be mapped from, the right side of the colon is the port the local service is expecting. For example, if you have a container that needs to be receiving something on port 80 but you would rather have that mapped to port 1080 or something, you would put a line like "-8080:8080". In the example above, I've included port mappings for the default qbittorrent webUI port, and then an optional line to include if you use a VPN that supports port forwarding.
-
"volumes" maps real file mappings on your system to "fake" directories that are accessible within the docker container.
Next are the environment variables. These are variables that can be set up for the container in advance, either to enable optional features or to provide variables like logins that are necessary for the service to work. The first two, PUID and GUID are only necessary if you have set up a limited permissions docker user as described in the introduction, otherwise they can be ignored.
The last environment variable that is needed across all of the different VPN providers is the environment variable "FIREWALL_OUTBOUND_SUBNETS". This is important if you want to be able to access the webUI of any of the services you have running through the Gluetun network. The ones used in my example compose are just examples; for your outbound subnet, you want to check what the local (LAN) IP address of your server is. If you already know the LAN IP of your server, simply replace the last number in the quad dots IPv4 address with a 0 and throw a /24 at the end. As an example, if the LAN IP of your server is "10.0.0.50" then you should set your firewall outbound subnet to "10.0.0.0/24".
If you do not know your LAN IP, an easy way to find it is to open a terminal and type in ip address and you'll likely see one or two outputs. Regardless of what they are named, you want to look at the connection that says something along the lines of <BROADCAST, MULTICAST> next to the name of the connection. In that connection, you should see a section in there that says something like inet 10.0.0.50/24 at the beginning of one of the lines (or 192.168.0.29, there are a few common defaults depending on your router). Once again, you just want to replace that last set of the quad dots in the IP with a 0 and you're golden. In this example, that would make our firewall outbound subnet 10.0.0.0/24
For the rest of the gluetun environment variables, it varies from VPN provider to provider. In my example case I've included the variables necessary for AirVPN, but you'll want to follow the guide for your VPN on the gluetun wiki providers page.
- "restart: unless-stopped" this tells docker to restart the service if it crashes or stops working unless you manually stop it.
The healthcheck: section is where we define how the "Healthy" status of the docker container is decided.
- test is where we define the actual "Healthy or not" test. In the case of gluetun, there is an existing function we can call for doing this, as shown in the above docker compose.
- interval defines the amount of time in between healthchecks
- timeout defines how long to wait on a response from the function before timing out
- retries defines how many times to retry after a timeout/failed connection before declaring the container unhealthy
- start_period sets how long to wait after the stack starts before performing the first healthcheck, to allow the service time to start up
Under the qBittorrent container there are a few arguments we haven't talked about yet. These are:
-
"TZ" Using the tz database, CTRL+F your city/town or a city/town in the same time zone as you and input it. This gives your logs and error messages times that will make sense to you and is a required environment variable.
-
"WEBUI_PORT" feels self-explanatory, but just for the sake of completeness: this sets the port used to access the qbittorrent webui
The set of volumes, again, are mapping where your config files will be saved on your real filesystem and where your torrents will be stored in your real filesystem.
The Healthcheck that we have set up for qbittorrent differs a little bit from that of the gluetun container- because we don't already have a function set up to do the connection test for us. To make sure the VPN connection is actually working, the test performs a basic DNS lookup instead.
- "network_mode service:gluetun" ensures your qbittorrent runs on the VPN network
    depends_on:
      gluetun:
        condition: service_healthy
This means that the qbittorrent client won't start until the gluetun service has initialized and is reporting a "healthy" status. If your gluetun doesn't launch and connect properly, qbit won't even turn on.
Lastly, we have our "stack restarter" container. This is what takes the information we gather with the failed healthchecks and actually does something about it. While there aren't really any properties of this that haven't already explained, I'll give a brief summary of what it is doing.
Every 30 seconds, the container runs gluetun's internal healthcheck. If the check fails, it will restart first gluetun then qbittorrent, potentially helping recover from a dropped connection or VPN node that has gone down. It additionally adds its own healthcheck, so that you can see if the stack restarter is working properly as well.
Step 2: Port Forwarding
While optional, if you are using any private trackers or just like giving back to the torrenting community, it is important to port forward. Essentially, if you are not port forwarded, to connect to any other user that is not port forwarded, you have to go through a peer who is. If you yourself are port forwarded, then you can connect to just about anybody and that makes it far easier to let people leech from you and get that ratio up.
For VPNs that give you static ports like AirVPN, setting up port forwarding is relatively simple and you just need to follow the steps outline on gluetun's VPN port forwarding page and your VPN provider page on the gluetun wiki. For VPNs that assign you random ports and rotate your ports like ProtonVPN, there is an additional environment variable you can add that will update qbittorrent's settings automatically when gluetun detects the port change. To do this, under your gluetun service's environment variables, add these lines:
- VPN_PORT_FORWARDING=on
- VPN_PORT_FORWARDING_UP_COMMAND=/bin/sh -c 'wget -O- --retry-connrefused --post-data "json={\"listen_port\":{{PORTS}}}" http://127.0.0.1:8080/api/v2/app/setPreferences 2>&1"
What this does is updates your webUI when the port updates in gluetun, saving you a lot of headache every time they rotate your port.
Note: for this command to work you must have the setting "Bypass authentication for clients on localhost" ENABLED, otherwise you will receive a 403 forbidden error.
Step 3: Checking to ensure the setup is working
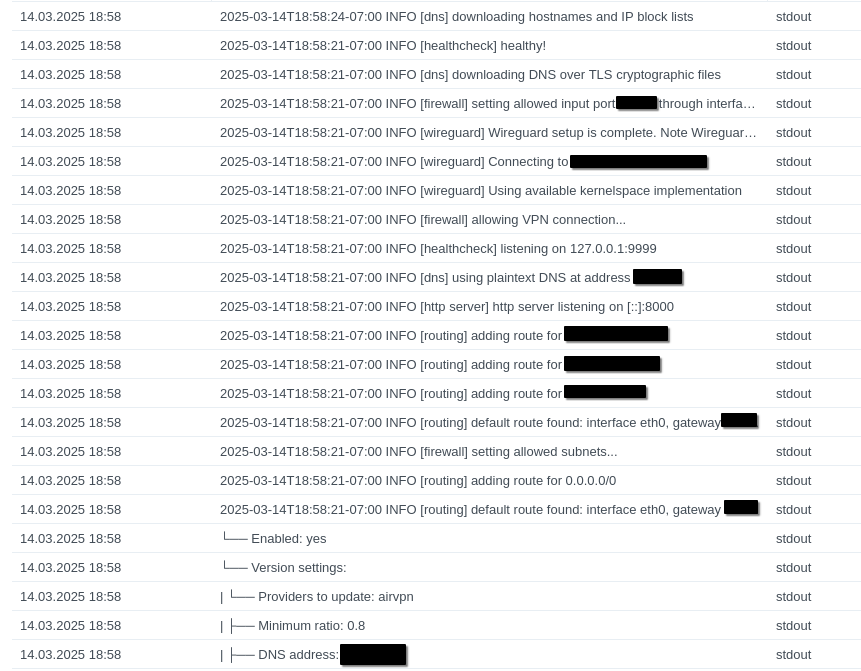
A good first step is to go into the gluetun container logs, in my case by using my synology gui but in your case likely dockge or some other portainer replacement. If gluetun is starting up properly, you should see something along the lines of this:
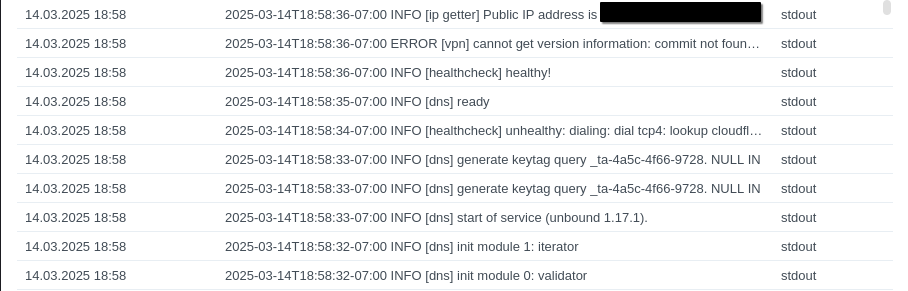
The IP address at the very top after "Public IP address is" should be the public address of the VPN server you are connected to.
Another step I like to take that is maybe redundant is to open the qbittorrent webUI, and then Options --> Advanced and set the "Network Interface" to "tun0". Depending on your network configuration it may be a different number, but you want it to be bound to your gluetun network interface.
While you're in the qbittorrent settings, make sure torrents you add are going to be downloaded to your intended directory. In my example compose file above, I've set our /your/torrent/directory real filesystem directory to be mapped to /data/torrents in the qbittorrent container. Because we've done that, we can set our Default Save Path to "/data/torrents"
Now, to test if our connections for qbittorrent are going through the VPN connection properly. My personal preferred tool for this is ipleak.net, which has a section called Torrent Address Detection. After you click "Activate", it will give you a magnet link to add to your qbittorrent client. Once your torrent says downloading metadata, come back to the ipleak page and see what data it gives you. Ideally, you will be seeing the country and IP of your VPN and not your actual country or IP.
Now there's nothing left to do but enjoy torrenting with better control over your connection, happy seeding! Also, if you have any questions feel free to try me in my signal chat.